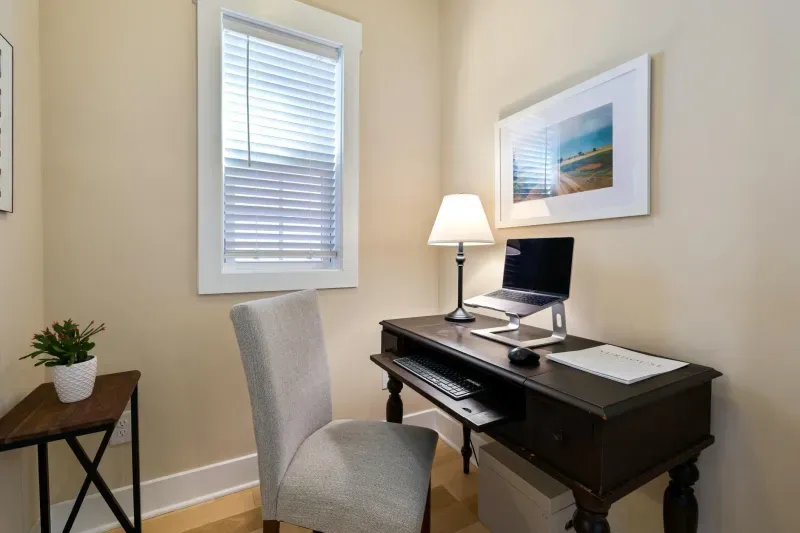
The correct desk height is not a universal number. A 75 cm desk may be fine if you are around 175 cm tall, your chair range fits you and your keyboard is not too thick. For everyone else, that standard height is only a starting point.
The real rule is this: chair height and desk height only make sense together. If you adjust one without checking the other, the body compensates. Shoulders rise, wrists bend, feet hang, or the lower back loses support.
I learned that from a small mistake. My desk height looked reasonable for my height, but my chair was slightly too low. That forced my shoulders to lift while typing. The difference was only a few centimetres, but after weeks of full remote work it was enough to create neck and shoulder tension.
This guide gives you formulas, tables and a practical check so you can adjust the setup without guessing.
The 90-degree rule, and why it is not enough
The classic ergonomic advice says: elbows at 90 degrees, knees at 90 degrees, screen at eye level. It is a useful starting point, but not a rigid law.
Real bodies work within ranges:
- Elbows: roughly 90 to 110 degrees.
- Knees: roughly 90 to 120 degrees.
- Hips: roughly 90 to 110 degrees.
If your chair has a slight forward seat angle, your knees may sit a little more open than 90 degrees. That can be perfectly comfortable. What you want to avoid is a chair so high that your feet hang, or a desk so high that your shoulders live near your ears.
The better target is simple: shoulders relaxed, elbows close to the body, wrists neutral, feet supported.
How to calculate desk height while sitting
Use this formula as a starting point:
Seated desk height = your height x 0.41
This gives the approximate height of the work surface where keyboard and forearms sit. It is not perfect, because keyboards, chair cushions, shoes and body proportions vary, but it is much better than assuming every desk should be 75 cm.
| Your height | Approx. seated desk height | Approx. chair seat height |
|---|---|---|
| 155 cm | 64 cm | 39 cm |
| 160 cm | 66 cm | 40 cm |
| 165 cm | 68 cm | 41 cm |
| 170 cm | 70 cm | 42 cm |
| 175 cm | 72 cm | 44 cm |
| 178 cm | 73 cm | 44 cm |
| 180 cm | 74 cm | 45 cm |
| 185 cm | 76 cm | 46 cm |
| 190 cm | 78 cm | 48 cm |
If you want the calculation without doing it manually, use the ergonomic calculator. It also gives monitor height and standing-desk references.
The elbow test
The formula gives you a starting point. The elbow test tells you whether it works.
- Sit back in the chair with feet supported.
- Let your shoulders relax.
- Keep elbows close to the body.
- Bend the elbows around 90 degrees.
- Your forearms should land at or just above keyboard height.
If the desk is clearly above the forearms, it is too high for the current chair position. If the forearms float well above the desk, it is too low.
Remember the keyboard. A thick keyboard can add 2 to 4 cm to the effective typing height. If you calculate desk height from the bare surface but then use a tall keyboard, your wrists may still bend upward.
How to adjust the chair step by step
Adjust the chair before the desk. Your body is the anchor.
Step 1: set seat height
Stand in front of the chair. The top of the seat should sit roughly just below the kneecap. Then sit down and check: feet fully supported, thighs relaxed, no hard pressure behind the knees.
If the chair needs to be high so your elbows match the desk and your feet no longer reach the floor, add a footrest. That is not a luxury accessory. It is often the correct ergonomic fix.
Step 2: set lumbar support
The lumbar support should meet the natural curve of the lower back. You want gentle support, not a hard push. If you have to arch your back to feel it, it is too aggressive. If you do not feel it at all, it is too low, too high or too far back.
Step 3: set armrests
Armrests should support relaxed shoulders. If they are higher than the desk or force the shoulders upward, lower them. If they stop you from getting close enough to the desk, move them back, lower them or remove them.
Step 4: verify against the desk
Now repeat the elbow test with your actual keyboard and mouse. This is where the setup becomes real. A chair that is correct in isolation can still be wrong when paired with the desk.
For a deeper sequence, use how to adjust an office chair.
What to do if your desk is not adjustable
If you also study at this desk, the study desk size and layout guide helps you check space for your laptop and notes alongside the height adjustment.
Most fixed desks sit around 72 to 75 cm. If that height fits your body, great. If it does not, there are fixes before replacing the desk.
If the desk is too high
This is common for shorter users or anyone using a thick keyboard.
- Raise the chair until elbows match the work surface.
- Add a footrest so feet are fully supported.
- Use a keyboard tray to lower the typing surface by 5 to 8 cm.
- If the desk is yours and the mismatch is large, shortening legs is sometimes cleaner than years of shoulder tension.
If the desk is too low
This is less common, but it happens for tall users.
- Add furniture risers under the legs.
- Use a taller desk frame.
- Consider a height-adjustable desk if multiple people use the workstation.
If your height sits outside the range that fixed desks usually fit, a standing desk or adjustable desk can be useful even if you rarely work standing. The main benefit is precise seated height. Compare options in best electric standing desks.
If you rent or cannot modify furniture
Many home offices are built in rented flats, shared rooms or spaces where cutting legs and drilling trays into desks is not realistic. In that case, use reversible fixes:
- A footrest instead of changing chair gas lift.
- A clamp-on keyboard tray instead of modifying the desktop.
- Monitor risers or arms that clamp without drilling.
- Furniture risers under the desk legs.
- A separate laptop stand that can be removed after work.
The aim is the same: elbows, feet and screen position. The method can be temporary as long as the posture is not.
If two people use the same desk
Shared desks need visible reset points. Otherwise the taller person raises everything, the shorter person adapts silently, and both end up slightly uncomfortable.
Mark or save:
- Chair height for each person.
- Footrest position.
- Monitor arm height.
- Desk preset if the desk is adjustable.
- Keyboard and mouse distance.
If the desk is fixed and one person is much shorter, the shorter person usually needs the chair raised plus footrest. If one person is much taller, monitor height is often the bigger issue.
Standing desk height
For standing work, use this formula:
Standing desk height = your height x 0.63
| Your height | Approx. standing desk height |
|---|---|
| 160 cm | 101 cm |
| 165 cm | 104 cm |
| 170 cm | 107 cm |
| 175 cm | 110 cm |
| 178 cm | 112 cm |
| 180 cm | 113 cm |
| 185 cm | 117 cm |
| 190 cm | 120 cm |
The elbow test is the same when standing: relaxed shoulders, elbows near 90 degrees, forearms level with the work surface.
Shoes matter. Barefoot, slippers and thick-soled shoes can change your effective height by 2 or 3 cm. If your desk has memory presets, save different heights if you regularly work in different footwear.
Standing is not automatically better than sitting. The point is to change position. If you stand locked in one posture for three hours, you have simply traded one static load for another. Read are standing desks worth it? if you are unsure.
Standing posture checks
When standing, check these details:
- Weight spread across both feet, not locked into one hip.
- Knees relaxed rather than stiff.
- Screen still at eye level.
- Keyboard at elbow height.
- Mouse close enough that the shoulder stays relaxed.
- Shoes or mat comfortable enough that foot fatigue does not become the new problem.
If standing makes your lower back tighter, alternate sooner. Many people do better with 20 to 40 minutes standing than with long blocks. A standing desk is a position-changing tool, not a command to stand all day.
The three most common height mistakes
1. Adjusting the desk without touching the chair
People buy a new desk, set it to the standard height and keep the old chair position. That is backwards. First fit the chair to your body. Then fit the desk to your elbows.
2. Ignoring keyboard thickness
The keyboard is part of the work surface. A thick keyboard or wrist rest changes wrist angle. If your wrists bend upward while typing, lower the typing surface or flatten the keyboard angle.
This is especially relevant if you have wrist symptoms. For prevention, read carpal tunnel prevention for remote workers.
3. Keeping old settings after changing chair
Every chair changes the geometry: seat thickness, height range, recline, lumbar support and armrest height. If you change the chair, recalculate the desk, monitor and keyboard positions.
4. Setting monitor height before seat height
Monitor height depends on where your eyes land after chair and desk are correct. If you raise the monitor first, then change chair height later, the screen will be wrong again.
The order is always body first, then desk, then screen.
5. Solving foot support with bad posture
Some people lower the chair until their feet touch the floor, even though that makes the desk too high for the elbows. That solves one problem by creating another. Raise the chair for the desk, then use a footrest for the feet.
One more thing: screen height
This article focuses on desk and chair height, but the screen can ruin everything. You can have perfect elbow and knee angles and still get neck pain if the monitor is too low.
The reference is simple: the top third of the screen should sit around eye level when your head is neutral. If you use a laptop, that usually means a laptop stand plus external keyboard and mouse. If you use a monitor with a weak stand, a riser or monitor arm may be enough.
My favourite line from Pep, my physiotherapist, is: “Your eyes can move for free. Your neck cannot.” If you need to bend the neck to read, move the screen.
For the full setup sequence, go to how to set up an ergonomic home office. If the bad height has already become pain, start with back pain when working from home or neck pain from computer work.
Quick troubleshooting table
| Symptom | Likely height issue | First fix |
|---|---|---|
| Shoulders raised while typing | Desk or keyboard too high | Raise chair, use footrest, lower keyboard tray |
| Feet hanging | Chair too high for leg support | Add footrest |
| Knees higher than hips | Chair too low | Raise chair and recheck desk |
| Wrists bent upward | Typing surface too high or keyboard tilted | Flatten keyboard, lower typing height |
| Neck bent down | Screen too low | Raise monitor or laptop |
| Leaning forward to read | Screen too far, text too small or lighting poor | Adjust distance, scaling and light |
Use this table after any equipment change. A new chair, keyboard, monitor arm or pair of shoes can change the setup enough to matter.
The shortest correct setup sequence
If you do not want to think through the whole article every time, use this:
- Sit fully back.
- Set feet and thighs.
- Match elbows to keyboard height.
- Support lower back.
- Raise screen to eye level.
- Bring mouse close.
- Move after 45 to 60 minutes.
That sequence fixes more real home offices than any single product recommendation.